While we will not be going into these panels in depth, keep in mind that if you want to add a gradient or two or more graduated colors to a shape, use the Gradient panel and the Gradient tool to adjust the gradient. The Gradient panel has three types of gradients, two of which can be stored as swatches in the Swatches panel with other default gradients that have been created; these can be accessed directly from the Gradient panel. Refer to Figure 8-52.
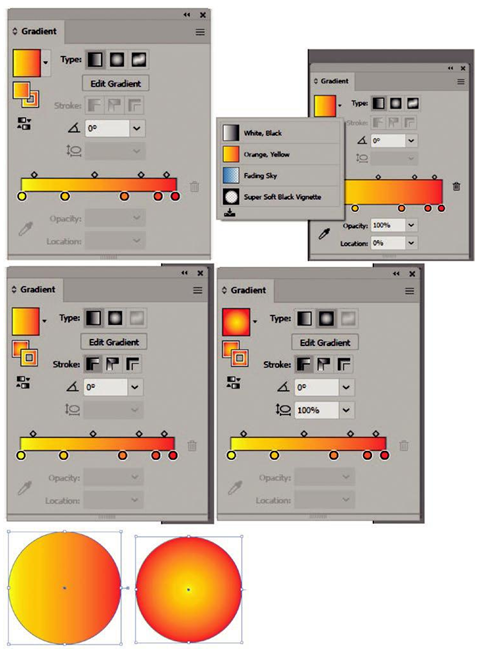
Figure 8-52. Gradient panel selecting and applying a gradient linear or radial
Linear is a line gradient, and radial is a circular gradient. They can have two or more round color swatch color stops and midpoint transition diamond sliders that can be adjusted on the gradient annotator.
They can be applied to fills and strokes in gradient editing mode. When on the selected shape, click the Edit Gradient button to start and select the fill or stroke to edit. Refer to Figure 8-52. Strokes containing gradients (linear or radial) can be applied within, along, or across the stroke. Refer to Figure 8-53.
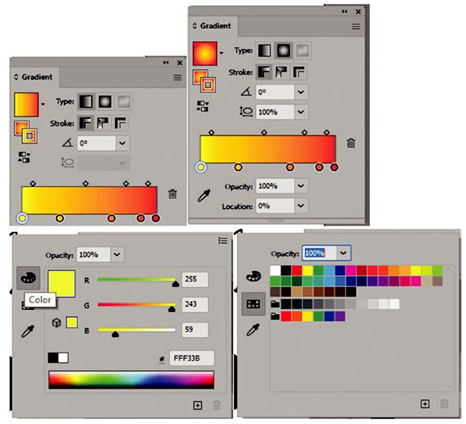
Figure 8-53. Use the Gradient panel to select and apply color stops to the annotator using color or solid swatches
Set each gradient you create, which can be set to an angle (-180, 0, 180) degrees by typing, or from the list and each color, stop swatch to a different color when you double- click the stop and select a color or swatch color from the pop-up panel.
Use the eyedropper color picker inside the stop or outside the panel to select a color from another shape or path. Click Esc to exit the color picker. Color Stops can be added by clicking a location on the annotator slider as well as selected and deleted using the trash can icon delete stop on the right of the annotator. Or drag the stop off the annotator. However, at least two color stops must always remain. Refer to Figure 8-53.
For a gradient, you can then set an opacity (0%–100%) for each stop and its location (0%–100%) on the annotator using the lower area of the panel. The midpoint slider location can also be adjusted as well. A gradient can be different for the fill and stroke. Strokes as mentioned earlier can be set linear and radial gradient. The gradient order can be reversed on a fill or stroke, and for radial gradients, you can set the aspect ratio (ellipse icon) using the drop-down list to be more ellipse-like (10%–800%). The round default is 100%. Lower numbers can be set down to 0.5% up to 32767% if you type them in the text area. Refer to Figure 8-54.
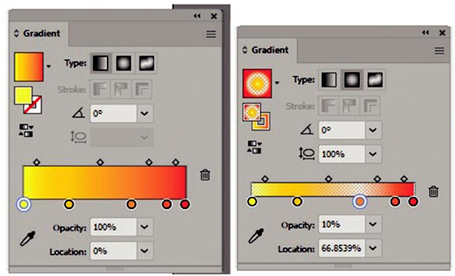
Figure 8-54. Use the Gradient panel to apply transparency to the selected color stop
Once your gradient is created, you can click the Add to Swatches icon found from the drop-down list of the active/previously used gradient to store it in the Swatches panel. Refer to Figure 8-55.
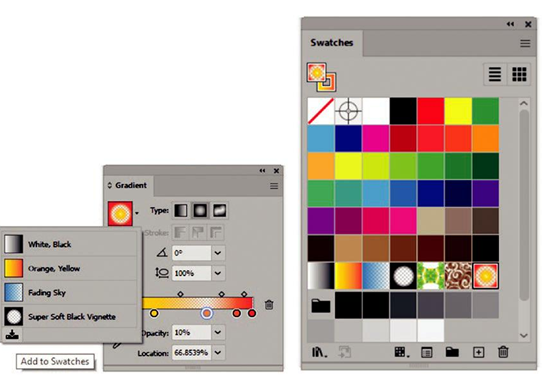
Figure 8-55. Use the Gradient panel menu to add a swatch to the Swatches panel
Your selected paths current gradients will continue to display for the fill/stroke in the Gradients panel.
Liner and radial gradients can be further edited using the Gradient tool (G). Drag out a new gradient angle with the tool on your selected path and use the annotator on the path to adjust instead of from the Gradient panel. Refer to Figure 8-56.
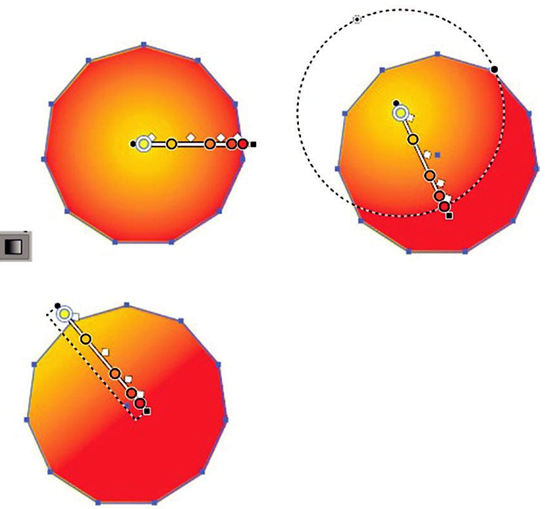
Figure 8-56. Use the Gradient tool and its annotator to modify the placement and angle of a radial and linear gradient
The third type of gradient, which we will not be discussing in length in this book, is the newer Freeform gradient. It relies on points and lines to create a type of gradient blend which is very good for creating smooth transitions such as for skin tones or 3D-like shapes, but only for fills and not strokes. These gradients are not stored in the Swatches panel, but you can save them to be used for a graphic style or as part of symbol. Refer to Figure 8-57.
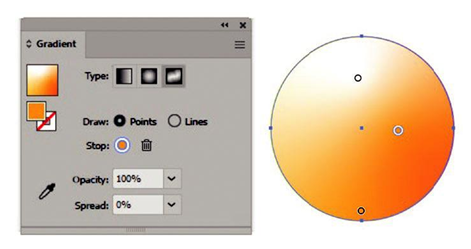
Figure 8-57. Gradient panel with Freeform Gradient options selected in the panel